Christmas is one of the best times of the year. And if you have kids, you know the joy of seeing their faces light up when they realize Santa squeezed himself down the chimney, dropped off a roomful of presents, and ate all the cookies in the house. It’s magical!
No matter your money situation, parenting style or what kind of milk you leave out for Santa, we all have something in common: We want to give our kids the best Christmas possible. And usually, this involves presents. If you’re wondering how much to spend on kids for Christmas, I’m going to walk you through a few things to think about before you start your Christmas shopping.
How Many Presents Should a Kid Get for Christmas?
Just last year, the average American family planned to spend $1,300 on Christmas, according to the Ramsey Solutions State of Personal Finance 2022 Q3 report. Whew! That sounds like a lot, right? Well, when you think about decorations, baking ingredients, holiday dinners and gifts for family, friends, coworkers and your kids’ teachers, it adds up fast.
Get expert money advice to reach your money goals faster!
We all want to give our family a holiday to remember. But when it’s time to plan Christmas gifts for kids, you might be asking yourself questions like, “How much should I spend on Christmas gifts for my kids?” and, “How many presents should a kid get for Christmas?”
Well, here’s the thing: The amount you should spend on Christmas gifts for your kids depends on a lot of factors—like the size of your family and your income. Because of that, I can’t give you an exact dollar amount to shoot for.
But there are some things to keep in mind so you can make the best decision for you and your family. So, to make sure you’re prepared, let’s go through three of the biggest things to think about when setting your Christmas budget.
1. Your Finances
The last thing you want to do is spend so much on presents that you can’t pay your electric bill next month. That’s where a budget helps! A budget gives you a big-picture look at your money situation and helps you understand what you can and can’t afford. Knowing this will help you plan how much to spend on gifts for each kid.
And if you’re trying to figure out how many presents you should give each child, your preplanned Christmas budget gets the final say. Setting a budget for each kid’s Christmas is key—no matter how old they are. You could spend $50 on a few small toys for one kid and $50 on one larger gift for another. The point is that the value of the gifts is equal. (And don’t forget to budget for stocking stuffers! Shopping at the dollar store is a great way to save money here.)
Decide your limits ahead of time and stick to them instead of filling up empty space under the tree. And definitely don’t go into debt by using a credit card to pay for Christmas gifts—that’s never a good idea.
2. Your Family Traditions
Growing up, your family might have celebrated Christmas by sharing an experience instead of stocking up on gifts. Or maybe you drank hot chocolate together and opened one special gift on Christmas Eve. These might be traditions you want to continue doing with your kids, or maybe you want to start some new ones!
You can give Christmas your own special twist by planning fun experiences or choosing unique gifts for your kids. Or if you want your home to be a place the family wants to be during the holidays, you can create some festive playlists, queue up some movies, and even plan some fun crafts, if that’s your thing. (You don’t have to spend a lot of money to have a beautiful, all-cash Christmas!)
3. Your Values
What does celebrating Christmas mean for you and your family? If the quality of your Christmas depends on the quantity of stuff under the tree, try to shift your focus to the true reason for this special holiday: celebrating the birth of Jesus.
You get to decide how gift exchanges fit into your Christmas celebration. Maybe instead of giving gifts, you serve your community or help a family in need have a great Christmas of their own. Whatever it is, focus on what’s important to your family.
Setting Gift Expectations With Kids
If you’re on a tight budget, the best thing you can do for your kids is keep them in the loop. In other words, they need to know if Christmas gifts will be a little lighter this year. You might need to kindly say, “I know you really want a new iPhone this year, but it’s just not in our budget.”
This is especially true if you’ve given a lot of gifts in the past. If you set a high bar last year, your kids might think this year will be just like last year—or better. And if all their friends are asking for—and getting—a new iPhone, they might expect the same thing. Be clear with your kids ahead of time, and you’ll help avoid any big disappointments on Christmas morning.
How to Teach Contentment This Christmas
It can be easy to get caught up in the hustle and bustle of the holidays. But if you’re not careful, scrolling through Pinterest, keeping up with the Joneses, and trying to buy everything on your kid’s list will replace the reason we celebrate Christmas in the first place. Here are some steps you can take to teach your kids about contentment this Christmas (and help them experience it!):
1. Be grateful.
Christmas is a great opportunity to take a deep breath and be thankful for everything you have. In the middle of the hustle and bustle of the season, you can take a minute to simply be content—and teach your kids about the power of contentment.
2. Keep things in perspective.
As much fun as new stuff is, the novelty can wear off pretty fast. That’s why it’s important for you to help your kids keep Christmas in perspective. Because as much fun as those presents are, pretty soon they’ll be just another toy in the toy box. Help your kids find contentment by putting some focus on being generous to others and remembering the reason for the season.
3. Set a positive example.
If your kids see you stressed throughout the holiday season, frantically rushing around buying lots of stuff, guess what? They’ll probably think about Christmas as a season of stress rather than a season of joy and peace. But if you spend time enjoying the holiday season instead of being stressed out, your kids will notice that too.
We’re all unique, and how we parent our kids is also unique. When it comes to raising kids and celebrating holidays, more is caught than taught. That means your kids will see your example as you give generously and receive graciously this Christmas season. So it’s not a matter of how many gifts they open on Christmas morning—it’s the spirit of how they’re given!
4. Give generously.
This Christmas, while you’re thinking about all the gifts you want to give your kids, take some time to show them how much giving to others matters too. Being generous not only helps others but also changes your heart in the process.
Want to help your kids learn how to be generous? Check out this gift finder. You’ll find gifts that will help them learn about giving, contentment and even how to give, save and spend. Yup—these are the gifts that keep on giving and teach the next generation how to win with money.
Want to Teach Your Kids About Contentment?
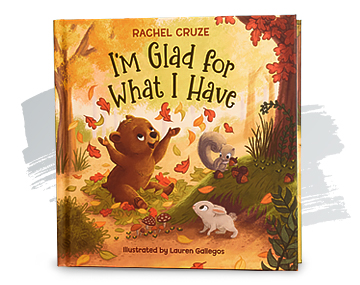
My new book—complete with rhyming words and adorable animals—is a great reminder that more stuff won’t bring lasting joy.


